Step 1 — Anonymize DICOM and Clinical Data
(client-side)
In this step, the participating institute anonymizes DICOM files and, where applicable, the associated clinical data locally in the user’s web browser. Original DICOM files, original clinical data, and local mapping files are not uploaded to the ZODIAC platform during this step.
- User selects the required Anonymization Profile. The selected profile defines which DICOM tags and clinical data fields are retained, removed, generalized, or pseudonymized.
- User selects the Source DICOM Folder. The source folder may contain DICOM files in any internal folder structure. Patient, study, and series grouping is detected from DICOM metadata, not from the original folder names.
-
User selects the Clinical Data File, if applicable.
The clinical file should follow the current ZODIAC clinical data template and must
include the required matching fields, including
Patient_IDandStudy_ID. The sameStudy_IDmay be used for different patients, because matching is based onPatient_ID + Study_ID. -
User selects the Destination Folder, which is a local folder on
the user’s computer where the anonymized output will be written.
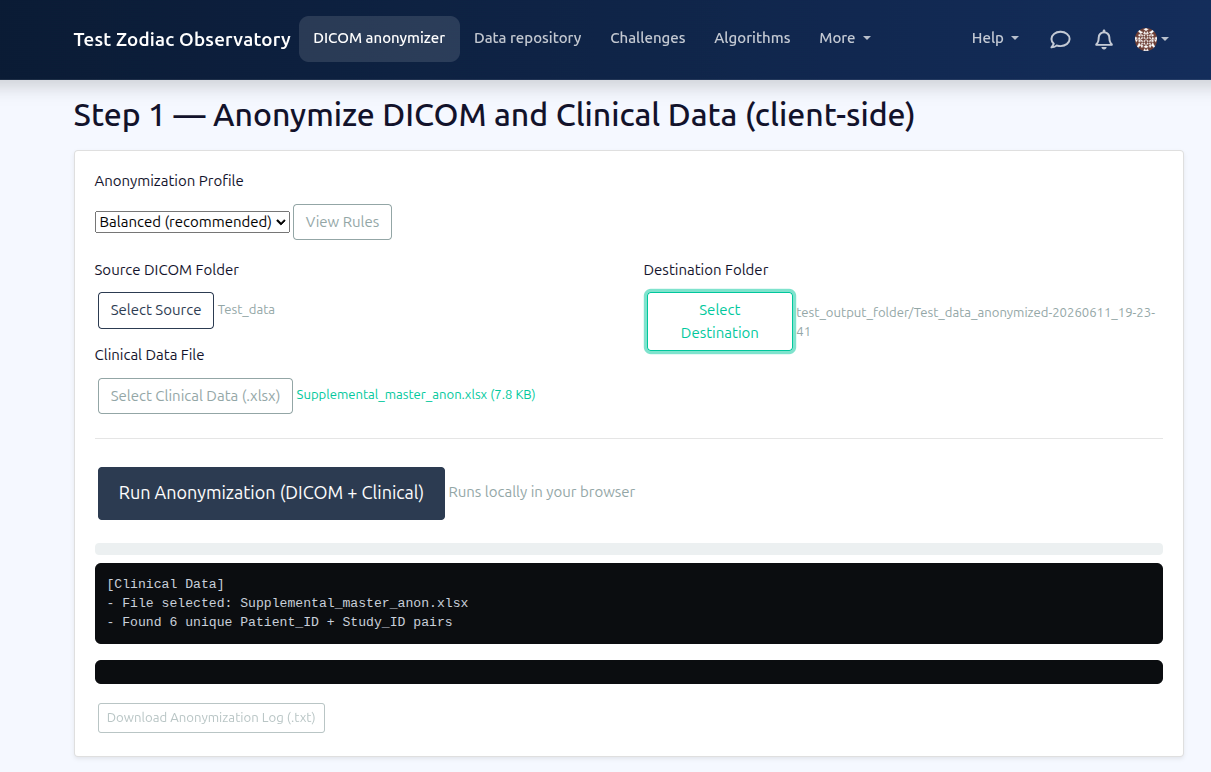
- User clicks "Run Anonymization (DICOM + Clinical)". The anonymization process runs fully client-side in the browser.
-
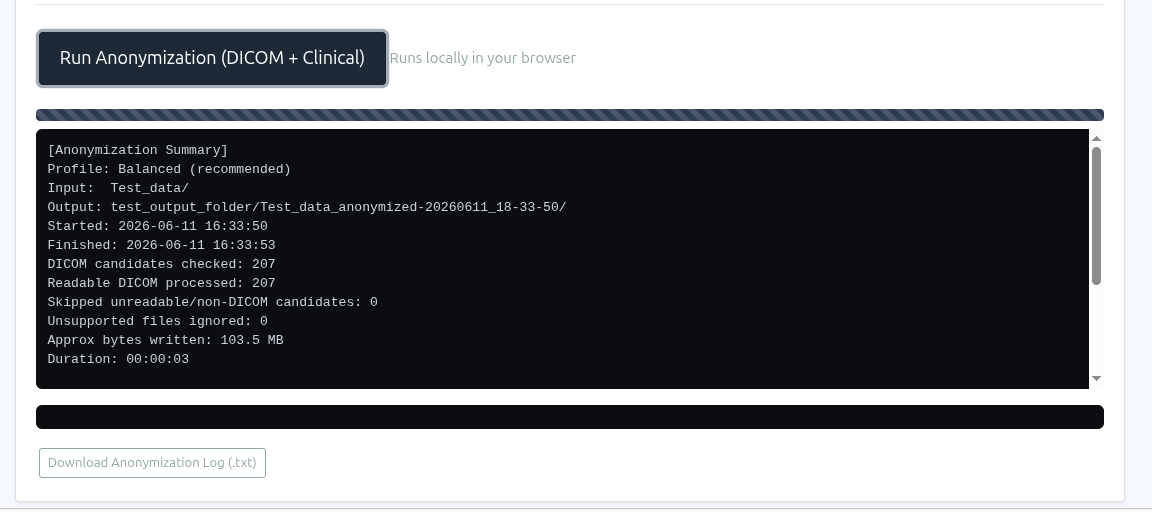
A progress bar and anonymization log are shown during processing. The log summarizes
the selected profile, input and output folders, processed DICOM files, skipped files,
clinical data processing, and generated local mapping information.
-
Result: a new local anonymized output folder is created. The output
contains anonymized DICOM files arranged in the standardized structure:
PAT_<anon_patient_id>/STU_<anon_study_id>/SER_<anon_series_uid>/
If a clinical file was provided, an anonymized clinical file is also written to the output folder. - Any local mapping or traceability files generated during anonymization remain under the control of the participating institute and must not be uploaded to the ZODIAC platform.